Showing posts with label design. Show all posts

Friday, March 29, 2013

Sugared Lime Spring Wreath DIY


I found this website, Design Seeds, through my sister Katie. Anyway, I need I wanted to make a spring wreath, and when I saw this beautiful color scheme of various limes on Design Seeds that I had my inspiration. I love how bright lime can be, yet in this color scheme, the lime is subtle and serene. Enjoy my wreath tutorial below and my take on these beautiful shades of spring green.

Supplies:
Paper Flowers
Ribbon Scraps in different shades of lime green
Plain Straw Wreath
Muslin or Canvas Scrap 12" long (to hang the wreath with)
White Acrylic Paint
Lace Paper Doilies


1. Paint on polka dots first. I used a cosmetic sponge to make my dots, but if you don't already have a circular sponge, you could easily cut one from a regular sponge.


2. Tie your muslin scrap onto the top of the wreath. Layer your ribbons on one side of the wreath and pin in place. 


3. Hot glue ribbons in place at the top of each ribbon. Add a lace paper doily on top of the ribbons.


4. Glue paper flowers on top of lace doily. Arrange the flowers in an odd number for the most aesthetic appeal. Three or five flowers will look best. 


5. Enjoy your wreath, hang it in the sunshine to greet your spring visitors and enjoy your spring!


Pin It!

Friday, February 22, 2013

Pintastic Things This Week

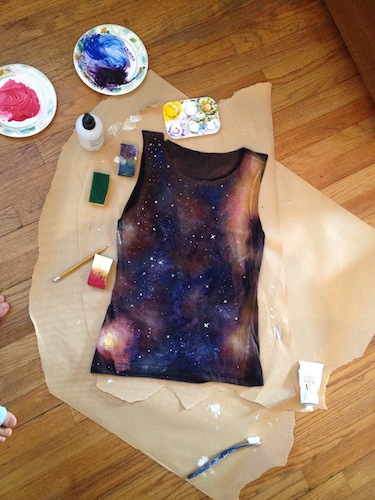
Check out this super cool galaxy shirt by How to Own It. I really want to make one of these!


And this is the absolutely prettiest possible way to store plastic bags! I love how bright it is! By Creative Home Making with Constanca Cabral.

This DIY calls to my love of the feather trend! Check it out at The Crafted Sparrow.


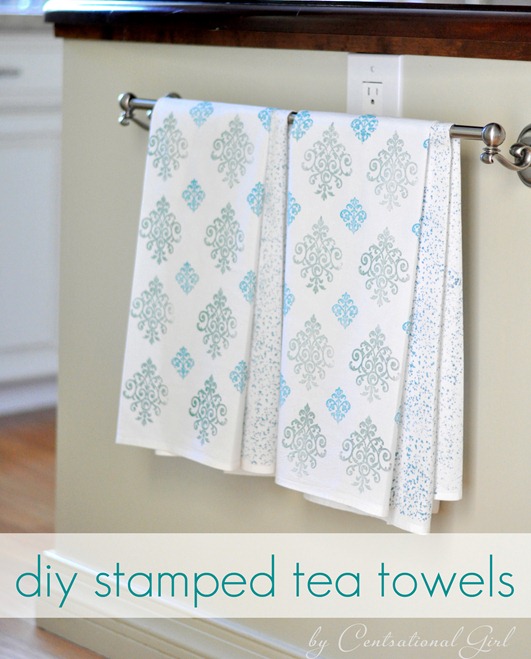
That's it for today! In case you didn't notice, today's round up was kind of a hodge podge without any particular theme because I stumbled upon so many different kinds of interesting DIY's this week on Pinterest. 

Want to repin or blog about some of these awesome projects? Be sure to link to the original source so that the artist/author gets credit. It's really easy for something to get pinned or linked so many times that it no longer traces back to its original source and the artist receives no feedback for his or her work...so use the original source and share these lovely posts!

-Taylor
Pin It!

Wednesday, February 20, 2013

Scrapbooking Instax photos


Today, I thought I would share with you a pretty scrapbook page I whipped up. I've been having loads of fun taking photos with my Fuji Instax Mini camera, which takes instant photos. Now, the thing about instant photos is that they aren't digital and there is no editing them, which is both good and bad. So it's taken some practice for me to get good photos. But I also love how fast I can have photos directly at my fingertips and ready to scrapbook with. 


This page features photos I have taken of flowers that my boyfriend has given me on various occasions. Flowers are so bright and colorful, it's a great way to practice taking photos with a point and shoot instant camera.


What are your favorite things to take photos of? I also take a lot of pictures of my cat.
Want to see another great idea for using your instant photos? Check out this DIY.
-Taylor
Pin It!

Wednesday, February 13, 2013

Valentines DIY: Jar O Dates

Need a quick, last-minute gift idea for valentines? I've got one for you today! Whip up a jar of dates to last a whole year! See the tutorial below.


Supplies:
Popsicle sticks (I bought my pre-printed at Michael's).
Ribbon Scraps
Empty Jar
Stickers (for decoration)

1. Tie all your ribbon scraps around the rim of the jar. This is a super fast way to decorate!

2. Write fun date ideas on your Popsicle sticks. I had five different kinds of sticks, so I made these types into categories, weekend dates that require planning, stay at home dates, etc.


3. Decorate your jar and you're done!

4. Take pictures...get photo-bombed.... (this is obviously not a step, but, my cat frequently does this so I thought I would share a photo).


Pin It!

Wednesday, February 6, 2013

Real Places to be Inspired

So many of us crafters tend to find inspiration by looking on the internet. We use blogs, product websites, social media, etc. It's fun and fast-we like finding instant inspiration gratification. However, sometimes it's not so instant and we wind up spending hours browsing Pinterest or a craft website and still don't stumble upon the 'Aha!' moment we were looking for. Using the internet to find inspiration can be extremely frustrating, which brings me to the point of this article: R-E-A-L brick-and-mortar places to find inspiration. Places that require you to get up and go. Sometimes a little movement is all we need.

The Library
Has it been awhile since you've been to the library? Believe it or not, your library is a hotbed of crafting inspiration. Most libraries have copies of all the latest craft books available for you to check out. In addition, take a look through photography books, back issues of magazines, find a new type of craft to try, pick up some interior design books.

Take a Train Ride
50.5% of the world's population lives in urban areas. Chances are, you're one of the 3.5 billion people who live in the city. Public transportation in the cities is cheap and you can get to many places. However, the idea here is not to get somewhere, it's just to ride the train or the subway. Grab a notebook (no iPads or laptops-no electronics!) and hop on the train and just write, doodle, make lists, whatever could jump start your inspiration. 

Coffee Shops
The title of this source of inspiration is pretty obvious. A hot cup of coffee, a fruity smoothie, bubble tea; whatever your favorite drink is, it's bound to make you feel better. Instead of making it your reward, just for a day, make it your motivation. Not to mention, coffee shops usually have great art, great music, and a fun and inspiring atmosphere.

College Campus
Does your blog or your craft involve fashion? The your local college campus is the place you should go to people-watch. College students will always be wearing the latest trends and it's fun to be inspired by what people are wearing. Want to find hipsters, athletes, girly-girls, business professionals, nerds, etc, all in one place? Campus is the way to go.

Quilt Shops
A quilt shop is a fantastic place to find inspiration. Now, when I say quilt shop, I don't mean a craft supply store like Michael's or Hobby Lobby, I'm talking mom-and-pop quilt and fabric shop. They tend to be super quirky, full of cute little grandmas, and gorgeous fabrics from ceiling to floor. Even if you're not someone who works with fabric, pop inside to take a look at patterns and color schemes.


Thanks for reading, I hope this inspires you to try a new source of inspiration! Where is your favorite place to go? I'll shamefully admit to Starbucks :) but I also l-o-v-e the library and riding the train. 
-Taylor


Pin It!

Monday, February 4, 2013

Recycled Message Vase DIY

I'm happy to share with you today a recycle-themed DIY. There are several photos of vases and jars similar to this going around the internet (but I cannot seem to track down the original source) but mine involves glitter (of course!). I'm recycling an old bottle in this tutorial and giving it a beautiful purpose. See the tutorial below!

Supplies: 
An old bottle
Hot glue gun
Gold Liquid Leaf paint (or any acrylic paint)
Gold Glitter
Glue Stick
Sponge paint brush

1. Using your hot glue gun, write out a word on the bottle. I chose the word "free."


Here's an up close shot of mine: be sure to make your letters with lots of glue (volume) so it stands out against the bottle. Don't forget to rub off the hot glue stringies!


2. Sponge on gold leaf paint. It's really important to use a sponge brush so that the paint doesn't create streaks up and down the bottle. It also covers the hot glue better.


Here's a photo of the finished paint job: I really like the antique-y look gold leaf paint gives it.


3. Rub your glue stick over the word that you've glued on. Be sure to get glue only on your letters!


4. Sprinkle glitter over the glue. Using a paintbrush, brush away excess glitter. Let dry.


5. Fill with flowers and display!


Pin It!

Wednesday, January 30, 2013

Living Room Makeover


I'm so excited to share pictures of my living room makeover. I painted my couch mint green (one of my favorite colors!!) sewed some new pillows, made new wall art, and incorporated some of previous craft projects. Unfortunately...I managed to delete my "before" pictures. The only one I have to share with you is a photo of my cat asleep on my couch, just so you can see how wild (awful) the cover for this sofa really was. 

Really crazy, huh? Anyway, there were just too many colors in that pattern, it was so overwhelming. I gave my living room a pastel-themed makeover, (pastels are super in right now, aren't they?) mainly coral and mint, gold and silver. See the pics below.


I am in love with the minty-ness of my couch. Plus, it's now much more durable thanks to the paint. In case you're wondering, I mixed regular interior semi-gloss paint with textile medium, which turns regular paint into "fabric paint." It's going to be super easy to keep clean, dirt just wipes right off. I also think that with a solid colored couch, it will be much easier to change trends/designs now. FYI, this is an IKEA Klippan Sofa. 

See how I did the chair restyle here. Want to make your own tribal baskets? See the tutorial here. Confetti art? Tutorial here. Also, keep an eye out for a tutorial on how to make your own geometric art soon!
Pin It!

Tuesday, January 29, 2013

Mini Hand-cut Hearts Garland DIY


Okay everyone, I'm excited to share a fun and quick valentines craft with you! But...I'm even more excited to share it with you because I've written it in a totally new format. So please, please tell me what you think! I really like how fun flipping through this tutorial is, so tell me if you agree. Also, please let me know if you have any problems with it! 


Thanks for reading! -Taylor
Pin It!

Tuesday, January 22, 2013

Confetti Art DIY


Supplies:
Canvas of some sort (I actually used a recycled foam board)
Adhesive metallic paper or vinyl (I used both!)
Adhesive glitter paper or vinyl


Notes: I used my Cricut Expression to cut perfectly uniform dots. If you don't have a die-cutting machine, you could certainly use a circle punch. Also, if your paper or is not adhesive, you could attach each circle with permanent, double-sided tape. 

Pin It!

Monday, January 21, 2013

Hand Painted Tribal Baskets DIY

I was super excited to do this project from the moment I was inspired by these at the Marion House Book. These are part of my upcoming living room makeover so I dashed over to my local thrift store to pick up some old baskets that would be perfect for a restyle. 


Supplies:
Acrylic Paints
Brushes
Woven Baskets

 1. Choose baskets with fairly solid weaving. If you have too many holes or empty spaces, your paint will leak and/or get very messy.
 2. Choose a color scheme. I l-o-v-e pale mint green, so I paired it with black and white. If you are doing a collection of baskets, they work best when you stick with the same color scheme throughout different patterns. 
3. Choose your patterns. I liked the simplicity of these Native American designs (easy to freehand paint!). I used the "Little Goose" and the "Big Foot" designs.
 4. The key to making these baskets is to paint in layers. Add your background paint first, then build up layers of details. Start simple and paint on the accents last. 

 Want to see more pictures? Here are some photos of how I painted my baskets step-by-step. 

Pin It!