Showing posts with label craft. Show all posts

Friday, March 29, 2013

Sugared Lime Spring Wreath DIY


I found this website, Design Seeds, through my sister Katie. Anyway, I need I wanted to make a spring wreath, and when I saw this beautiful color scheme of various limes on Design Seeds that I had my inspiration. I love how bright lime can be, yet in this color scheme, the lime is subtle and serene. Enjoy my wreath tutorial below and my take on these beautiful shades of spring green.

Supplies:
Paper Flowers
Ribbon Scraps in different shades of lime green
Plain Straw Wreath
Muslin or Canvas Scrap 12" long (to hang the wreath with)
White Acrylic Paint
Lace Paper Doilies


1. Paint on polka dots first. I used a cosmetic sponge to make my dots, but if you don't already have a circular sponge, you could easily cut one from a regular sponge.


2. Tie your muslin scrap onto the top of the wreath. Layer your ribbons on one side of the wreath and pin in place. 


3. Hot glue ribbons in place at the top of each ribbon. Add a lace paper doily on top of the ribbons.


4. Glue paper flowers on top of lace doily. Arrange the flowers in an odd number for the most aesthetic appeal. Three or five flowers will look best. 


5. Enjoy your wreath, hang it in the sunshine to greet your spring visitors and enjoy your spring!


Pin It!

Thursday, March 28, 2013

Bunny Garden Rocks


Katie and I whipped up this project a few weeks ago. Toss these cute little rocks into your garden. They're easy on your supplies too, you only need white and black paint pens and small rocks or stones.


Draw on white bunnies first, then use a finer black pen to add on details. With other colors, you could easily make chicks, ducks, Easter eggs, flowers, or other spring-y designs.


What do you think? Have any decorated rocks in your garden?

Thanks Katie, for sharing this DIY!
Pin It!

Tuesday, March 26, 2013

Quick and Easy Painted Bunnies


Hello everyone,

It's been awhile. Sometimes I just need to step back. Take a break, breathe, have some "think" time. I've been extremely busy teaching this semester, and doing lots of my own writing as well. For a few weeks, I kept thinking, "I just can't do this blog thing anymore, it's just too much." Now, I think, for the moment, I want to continue. But my posts will be a little less frequent for the time being. Sanity throughout the semester is important. 

This project was a wild goose chase. I had this great idea that I would paint plastic bunnies shiny and gold and use them for crafts this spring. So I go looking for plastic bunnies and couldn't find them anywhere. I checked Target, Hobby Lobby, Michael's, etc, and couldn't find small plastic ones, only plus bunnies. Finally, I found some at Wal-mart, who knew, right? Then I went to paint them with my favorite gold paint, Liquid Leaf, but the bottle had self-sealed and I couldn't open it. I was about to give up on the bunnies when my sister suggested nail polish. Genius! So, the DIY was still on. Enjoy the pics! These cute little bunnies have so many possible projects waiting on them! I decorated a candle (see pic above), but there are so many more DIYs just waiting to happen!
1. Prep: I used white polish to paint over the bright pink and black details.
2. Painting the bunnies took about 2 coats each. I painted them neon yellow, pink, gold, and mint. (My current favorite colors!)
 3. Let them dry between coats!


Pin It!

Sunday, February 24, 2013

Writing Rules to Follow


This week, all the posts on this blog will focus on writing and blogging. I hope this inspires you to break out of your comfort zone! We all need to do that sometimes...change is good. Change is creative and change is a habit of creative people. Changing your writing style, in large or small ways, will help you not only reach more readers but reach your loyal ones more effectively. 

Check back all week for tips and thoughts about writing.
-Taylor

Pin It!

Friday, February 22, 2013

Pintastic Things This Week

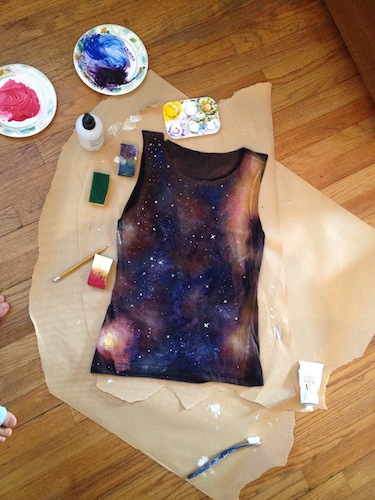
Check out this super cool galaxy shirt by How to Own It. I really want to make one of these!


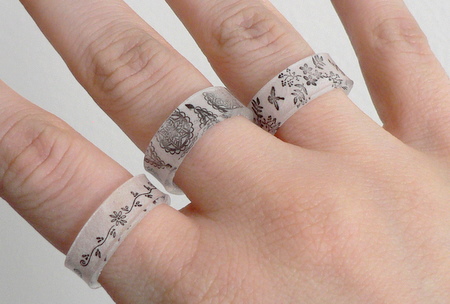
And this is the absolutely prettiest possible way to store plastic bags! I love how bright it is! By Creative Home Making with Constanca Cabral.

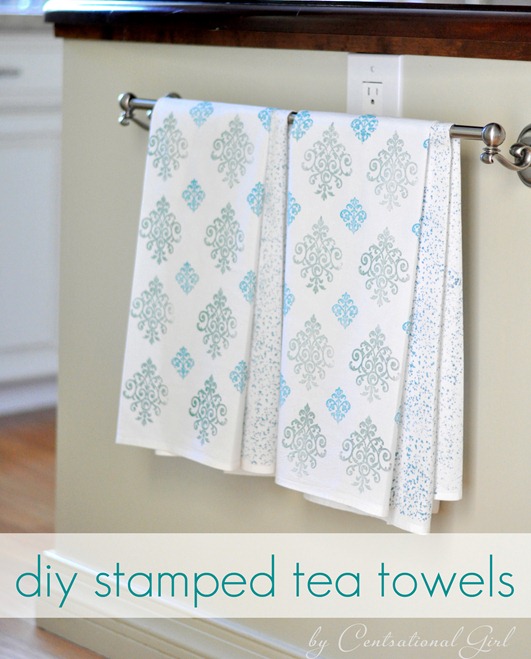
This DIY calls to my love of the feather trend! Check it out at The Crafted Sparrow.


That's it for today! In case you didn't notice, today's round up was kind of a hodge podge without any particular theme because I stumbled upon so many different kinds of interesting DIY's this week on Pinterest. 

Want to repin or blog about some of these awesome projects? Be sure to link to the original source so that the artist/author gets credit. It's really easy for something to get pinned or linked so many times that it no longer traces back to its original source and the artist receives no feedback for his or her work...so use the original source and share these lovely posts!

-Taylor
Pin It!

Thursday, February 21, 2013

Kitty Ravioli Toy DIY


Supplies:
Catnip
Fabric Scraps
Sewing Machine
Cotton or Polyester Stuffing


1. Cut 2 x 2 inch squares out of fabric scraps. 


2. Putting the wrong sides of two of the fabric squares together, sew around three sides of each set of squares. Don't sew on the very edge-sew about 1/4 inch in to make the ravioli shape.


3. Stuff with a small pinch of cotton stuffing and then sprinkle in about a teaspoon of catnip.


4. Sew up remaining side and you're done!

I whipped up a dozen of these cat toys in about fifteen minutes. My kitten loves them! His reaction to catnip is hilarious-first he plays and gets hyper and then his eyes get glazed over and he's totally mellow. It's really funny.
Pin It!

Wednesday, February 20, 2013

Scrapbooking Instax photos


Today, I thought I would share with you a pretty scrapbook page I whipped up. I've been having loads of fun taking photos with my Fuji Instax Mini camera, which takes instant photos. Now, the thing about instant photos is that they aren't digital and there is no editing them, which is both good and bad. So it's taken some practice for me to get good photos. But I also love how fast I can have photos directly at my fingertips and ready to scrapbook with. 


This page features photos I have taken of flowers that my boyfriend has given me on various occasions. Flowers are so bright and colorful, it's a great way to practice taking photos with a point and shoot instant camera.


What are your favorite things to take photos of? I also take a lot of pictures of my cat.
Want to see another great idea for using your instant photos? Check out this DIY.
-Taylor
Pin It!

Tuesday, February 19, 2013

Tips for New Bloggers-Interview Series-Kam of Campfire chic


This Spring, I'm hosting a series of interviews with accomplished and talented bloggers. We're talking about tips for us newbies and they've got some amazing answers. So, follow along, and learn with me from some of the best craft and lifestyle bloggers out there! 


Today's interview is with Kam of Campfire Chic. Here's her story: Campfire Chic is my story as a crafty camper. I share my story as a 9-5er looking for adventure and a handmade life. The posts I share encourage my readers to take risks and try new things, like camping, rock climbing, and yoga, while maintaining their current interests and responsibilities. Campfire Chic is about accepting challenges, setting achievable goals, and documenting the journey toward the finish line. I search out and share different methods for organization and goal setting because I believe that these can lead to a more productive life...which leaves plenty of time for more adventure! Campfire Chic allows me document my journey to adventure...the tale of a crafty camper.


1.      What's one super simple thing that every new blogger should be doing with their posts?
    There are quite a few things a blogger can do with a new post, but the most important? Proofread! I can’t tell you how silly I feel when I’m sitting at work glancing through my blog post for the day on my phone only to see a huge spelling/grammatical error. It’s the worst! I know that I can’t get home to fix it for a few hours, and by then, the post isn't as fresh. Proofreading your work before publishing is important. If you’re not willing to put the work in to publish good work, why should somebody read it?


2.      Did you have an 'Aha!' moment when you first started blogging that has helped you greatly? (How to do something, a nifty new trick, etc)
    My biggest Aha! Moment was when I realized I could give myself permission to not post 7 days a week. My analytics showed that my readership drops significantly on Saturday and Sunday, so why bother publishing perfectly good content on those days? Don’t feel pressured to have to stick to a specific “you’ll only be taken seriously if…” kind of schedule. Go ahead and only post on Monday, Wednesday, and Friday! Go ahead and only post once a week!

3. What's been your experience working with other bloggers and what kind of networking do you recommend?
    I have three years of experience working with other bloggers in different ways. I submit guest blog posts, host and participate in blog parties, co-host a semi-annual journaling challenge known as 30 Days of Lists, contribute to ebooks, you name it! Depending on your niche, I would avoid calling it networking and thinking more along the lines of building relationships. Some of these relationships are going to be more professional in nature, but it is still a relationship!

     When interacting with other bloggers, I suggest being yourself, being honest with deadlines and expectations, and being open to possibilities. Maybe you were hoping to get a guest blog post from a sewing blogger but ended up planning a co-hosted series of posts! The possibilities are endless, it just takes a little bravery to jump on board. 


Thanks Kam for a great interview! What I love about Kam's blog is her mix of crafty and DIY lifestyle things with informative and interesting posts about being a blogger. She has some amazing articles about meeting your blog goals and being more productive! Thanks for reading and check back soon for more interviews!
Pin It!

Monday, February 18, 2013

5 Minute DIY: Color Blocked Feather Bookmarks

This morning I was browsing pretty things on Anthropologie's website. My relationship with Anthropologie is like this: You know that super cool, super impressive person that you think is so far above you, they'll never look down and see you exist? Well, Anthropologie's that person and I'd like to think some day we'll be friends (when they drop their prices dramatically). Anyway, This DIY is inspired by some of the cute little charms they have in their shop.

Supplies:
Neutral-color scrapbook paper (beige, white on white, gray, etc.)
Colored paper scraps
adhesive, doodling pens

1. Hand cut 6-7 inch feathers from neutral-color paper. Shoot for whimsical-no need to cut each feather exactly the same!

2. On the bottom third of each feather, glue on a colored scrap and trim to fit the feather.

3. Doodle on cute messages and mark your place in your favorite books!

Pin It!

Wednesday, February 13, 2013

Valentines DIY: Jar O Dates

Need a quick, last-minute gift idea for valentines? I've got one for you today! Whip up a jar of dates to last a whole year! See the tutorial below.


Supplies:
Popsicle sticks (I bought my pre-printed at Michael's).
Ribbon Scraps
Empty Jar
Stickers (for decoration)

1. Tie all your ribbon scraps around the rim of the jar. This is a super fast way to decorate!

2. Write fun date ideas on your Popsicle sticks. I had five different kinds of sticks, so I made these types into categories, weekend dates that require planning, stay at home dates, etc.


3. Decorate your jar and you're done!

4. Take pictures...get photo-bombed.... (this is obviously not a step, but, my cat frequently does this so I thought I would share a photo).


Pin It!